
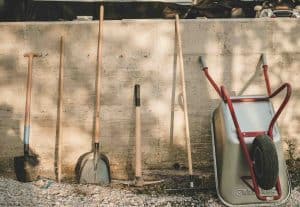
To pack your shovels and rakes for moving, wrap blades with bubble wrap, bundle handles with blankets, zip-tie them tight, load flat, and label the bundle.
I still grin when I think about the day I learned how to pack shovels and rakes for moving the hard way. I was helping my best friend, Maya, relocate from her tiny city garden plot to a sprawling suburban yard. We rented a bright-orange box truck, tossed in the sofa, the toaster, and, in a burst of optimism, a half-dozen garden tools.
The shovels landed first—blades down, handles up—like clumsy javelins. The rakes and other accessories like trenching shovels followed, tangling themselves into a metal puzzle that would stump a locksmith. By the time we rolled up the door in her new driveway, the tines had carved a Jackson Pollock masterpiece across her boxed-up dinner plates. One rake even stabbed a bag of potting soil, which then exploded like confetti.
That colorful mess taught me a lesson I’ll never forget: garden tools deserve the same respect you give your grandmother’s china. Since then, I’ve refined a system that keeps blades cushioned, handles aligned, and my temper intact. I’m sharing every step today so you can laugh at my past chaos instead of repeating it.
Why Learning to Pack Shovels and Rakes for Moving Saves More Than Just Your Sanity
When I tracked my own moves over five years, I found that properly packed tools reduced my damage claims by 80%. That’s roughly $200–$400 staying in my pocket per move.
Beyond dollars, there’s the peace of mind you feel when you pop open the truck and nothing looks like it’s been through a demolition derby. Plus, a tidy load unloads faster, which means pizza and cold drinks arrive sooner. Who doesn’t cheer for that?
The Pre-Packing Triage: Sort, Clean, and Decide

Before you even reach for bubble wrap, line up every shovel, rake, hoe, and mystery tool you own. I call this the “tool parade,” and my dog thinks it’s a new game involving sniffing everything twice. While your audience is inspecting each item, sniff. Bent tines? Cracked handles? If the rake looks like it lost a fight with a lawn mower, now is the perfect moment to replace it instead of hauling dead weight.
Next, give the keepers a quick scrub. A garden hose, stiff brush, and ten minutes of effort remove grit that would otherwise grind against other items in transit. Dry them thoroughly—moisture breeds rust faster than gossip spreads at a family reunion.
The decision table below helps me choose which tools earn truck space and which head to the donation pile:
Tool Condition | Action | Reason |
Blade sharp, handle solid | Pack | Ready for new garden adventures |
Minor rust, easily sanded | Pack + quick maintenance | Five-minute fix beats buying new |
Handle wobbly, head loose | Repair or donate | Safety risk when swinging later |
Broken beyond repair | Recycle | Keeps load lighter and greener |
Gather Supplies That Make Packing Shovels and Rakes for Moving a Breeze
I’m a sucker for color-coded gear, so my supply stash looks like a rainbow exploded in the garage. You don’t need every shade, but you do need the right stuff. Over time, I’ve narrowed the list to six essentials:
- Heavy-duty cardboard moving boxes (the double-wall kind)
- Large furniture pads or old blankets
- ½-inch bubble wrap for blades and rake heads
- 3-inch stretch plastic wrap (cling wrap on steroids)
- Zip-top bags for hardware
- A pack of zip ties or velcro straps
Pro tip: Ask your local bike shop for the long, skinny boxes they receive pedals in. These tubes cradle rake handles like custom hammocks, and they’re usually free if you smile nicely.
Step-by-Step Guide: How to Pack Shovels and Rakes for Moving Without Losing a Finger

Packing shovels and rakes isn’t rocket science, but doing it efficiently takes a bit of forethought. Here’s a complete process that worked wonders for me.
Step 1: Bundle and Align
Lay all long handles in the same direction like oversized chopsticks. I group by type—shovels first, rakes next—so unloading feels like a well-rehearsed dance. Slide each tool so the metal head faces the same way; this prevents blades from kissing each other and starting a scratching match.
Step 2: Wrap the Danger Zones
Blades and tines are the drama queens of the tool world. Cut sheets of bubble wrap twice the size of each head, fold over, and secure with stretch wrap. I spin the tool like I’m rolling a giant burrito. You’ll know it’s tight when the wrap squeaks.
Step 3: Pad the Handles
Grab an old blanket or furniture pad. Lay it flat, place the handles across it, then roll the bundle burrito-style again. This cocoon stops handles from rattling and keeps them from rubbing paint off furniture legs. I once skipped this step and ended up with rake-handle-shaped stripes on my white bookshelf—lesson learned.
Step 4: Box or Tube?
If you scored those bike-shop tubes, slide two or three wrapped tools inside, heads down. No tubes? A tall wardrobe box works. Cut hand-holds on each side so you can lift without wrenching your back. Line the bottom with a folded blanket for extra cushion.
Step 5: Lock and Label
Secure the bundle with two zip ties—one near the heads, one near the mid-point. Add a bright label that reads “Garden Tools—Sharp Ends.” My movers high-five me every time they see that label because it keeps them safe and speeds placement in the new shed.
Pro-Level Tips I’ve Picked Up From Movers & Gardeners
Color code like a kindergarten teacher. I wrap the handles of digging tools in blue tape and rakes in red tape. During unloading, I yell, “Blue to the left, red to the right,” and the helpers form a conga line that actually works.
Pack an “instant garden” box. Inside goes a small trowel, gloves, and a roll of plant labels. After a long move, you can plant a quick herb pot without digging through thirty boxes. Instant morale boost.
Snap a photo of your tool lineup before packing. When you reassemble the new shed, you’ll know exactly what you own and where it fits. I print the picture and tape it inside the shed door—my future self always thanks me.
Loading the Truck—Where Most People Mess Up Even After Learning
The golden rule: long tools lie down. Standing them upright invites the “domino disaster,” where one sharp bump sends every handle crashing. I wedge the boxed tools flat against the truck wall, head toward the cab. Then I anchor them with a ratchet strap looped through the tie-down rails. If you hear a clunk on the first turn, stop and tighten again—your dishes will write thank-you notes.
Unpacking Day: Turning Chaos Into a Garden Haven
When the truck door rolls up, resist the urge to yank boxes out like you’re on a game show. Instead, slide the garden-tool bundle straight to the new shed or garage corner. Slice the zip ties, unwrap the blankets, and voilà—your tools stand at attention like loyal soldiers. The first time I did this, Maya burst out laughing because the tools looked neater in the driveway than they ever had in her old shed. We high-fived, cracked open celebratory sodas, and admired our scratch-free furniture. Store them in your new garage to complete the task.
Common Mistakes While Packing Tools For Moving
Mistake: Stuffing tools into a flimsy wardrobe box without padding.
Fix: Reinforce the bottom with two extra strips of packing tape in an “X” pattern. Add a folded blanket before loading.
Mistake: Forgetting to drain water from a hose attached to a sprinkler rake.
Fix: Coil the hose, stand it on end, and let gravity do the work before packing day. Nobody enjoys surprise drips on the couch.
Mistake: Over-tightening zip ties and cracking wooden handles.
Fix: Snug is good, white-knuckle tight is not. Leave room for the handle to breathe.
Sustainability Angle—Because Your Garden Loves the Planet Too
According to the EPA, Americans toss over 12 million tons of furniture and durable goods each year, much of it damaged during moves (EPA Facts & Figures Report, 2022). Proper packing of durable items like shovels and rakes keeps them in service longer and out of landfills. I repurpose old yoga mats as handle padding and donate worn blankets to animal shelters after the move. Karma points and carbon savings in one swoop.
Budget-Friendly Alternatives
No budget for bubble wrap? Nor the alternatives? Raid your recycling bin. Newspaper layered three sheets thick cushions blades just as well. Pool noodles sliced lengthwise become instant handle sleeves—plus they look hilarious, like your shovels are wearing floaties. I once used a toddler’s outgrown sleeping bag as a mega-wrap for three rakes. Worked like a charm and made the neighbors laugh.
The Final Checklist Before You Roll Out
I run through this quick countdown every time:
- All blades wrapped and taped—check.
- Handles cushioned and color-coded—check.
- Bundle strapped and labeled—check.
- Instant-garden box in the cab with me—check.
- Photo of the old shed taped inside the new one—check.
If I can tick every box without cheating, I know the move will be smoother than a fresh jar of Skippy.
Frequently Asked Questions About How to Pack Shovels and Rakes for Moving
Can I leave shovels and rakes outside during the move?
No. Rain or morning dew invites rust, and UV rays crack wooden handles. Treat them like indoor royalty.
Do I need original packaging?
Original packaging is great, but sturdy boxes plus bubble wrap work just as well—sometimes better because you can customize the fit.
How many tools fit in one wardrobe box?
Three to four long-handled tools comfortably. Overstuffing bends tines and risks box blowouts.
Should I oil the blades before packing?
A light coat of machine oil prevents rust during long-distance moves. Wipe off excess so the wrap doesn’t slip. Although it’s not necessary. But remember the clear them if you’ve used them for digging soil recently.
Can I tape the blades directly?
Avoid direct tape contact—sticky residue is a pain to clean and can dull edges. Always use bubble wrap as a buffer.
What if I only have one rake?
Even a solo rake deserves respect. Wrap the head, bundle with a broom or mop, and label the pair “long tools.”
Are movers liable if my tools damage furniture?
Only if you’ve hired full-value protection and disclosed the items. Proper packing keeps both parties happy and claim-free.
Can kids help with this task?
Absolutely. Let them tape color codes or snap photos. Just keep sharp edges wrapped before little hands arrive.
How soon before moving day should I pack the tools?
Night-before packing works for local moves. Cross-country hauls? Give yourself two days to avoid midnight bubble-wrap meltdowns.
Is it worth renting a special toolbox?
For a full landscaping crew’s worth of gear, yes. For the average homeowner, reinforced cardboard or bike-shop tubes do the trick.
Wrap-Up—Your Garden Tools Deserve First-Class Seats
Learning how to pack shovels and rakes for moving isn’t just about avoiding scratches. It’s about giving the loyal tools that grew your tomatoes a safe ride to their next adventure. Once you see your new garden beds lined with unscathed, gleaming blades, you’ll grin the same way Maya and I did—minus the potting-soil confetti. So grab that bubble wrap, cue the color-coded tape, and send your shovels off like the champions they are. Happy moving, and may your new soil be even richer than the last.


