
I still smell the fresh-cut grass from that Saturday morning. I dug the tip of my old square-point shovel under a stubborn dandelion, gave a cocky tug, and—crack!—the handle split right below the grip.
Instead of driving to the hardware store for a new $45 shovel, I drove myself straight to the garage, grabbed a five-dollar hickory replacement handle, and turned the whole mess into a 20-minute victory dance. That tiny rescue mission is why I can now teach you how to replace a shovel handle without swearing, bleeding, or buying tools you will never use again.
Below you’ll find the exact same process I follow every time one of my digging shovels snaps, splinters, or just gives up the ghost. I have used it on spades, scoops, trenchers, and even a grain shovel that once belonged to my grand-dad. The steps work, the jokes are free, and the savings add up fast—especially if you garden the way I do, like you’re auditioning for a reality show called “World’s Most Aggressive Compost Pile.”
Handle Types at a Glance

Handle Material | Typical Price | Lifespan (heavy use) | Vibe Check |
Ash (solid) | $8-12 | 6–8 years | Classic, springy |
Hickory | $10-15 | 8–10 years | Tough, slightly heavier |
Fiberglass | $12-18 | 10–12 years | Zero splinters, neon colors |
Hardwood “mystery” | $5–7 | 2–4 years | Buy only if you like surprises |
Why Shovel Handle Replacement Matters
Every time you pry up a root ball, the blade acts like a crowbar, and the handle is the lever. A cracked lever multiplies the force on your spine instead of the soil. According to the Bureau of Labor Statistics, 36% of backyard-tool injuries are “non-impact overexertion”—fancy talk for “I tried to lift a rock, and the shovel lost.” A fresh handle restores the correct flex pattern and keeps the load in the dirt where it belongs.
Front-to-Back Grain: The Tiny Detail That Prevents Fire-Wood
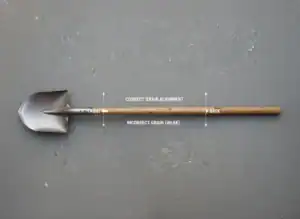
Imagine the wood’s grain lines as a stack of spaghetti. Mount the handle so those noodles run parallel to the blade’s front and back edges. When you jump on the shoulders, the compressive force travels along the spaghetti strands instead of trying to snap them sideways. Mount it 90° off, and you’re basically asking the grain to split like a cheap chopstick. I learned this the hard way when I rushed the job at dusk and ended up with kindling after three scoops.
Common Problems & How to Troubleshoot
Even a “simple” handle swap can throw curveballs. Keep this mini table in your back pocket.
Quick-Fix Cheat-Sheet
Symptom | Likely Culprit | 2-Minute Fix |
Handle splits while you hammer it in | Too-tight shoulder or dry wood | Back it out, rasp the high spots, rub with candle wax as lube |
Head still wiggles after new pin | Socket walls stretched | Pound a thin washer or beer-can shim inside the socket, then re-seat |
Rivet hole mis-aligned | Drill wandered | Fill off-center hole with hardwood dowel and glue, re-drill in the right spot |
Blade clangs like a cow-bell | Loose socket or cracked neck | Retire the shovel—see next section |
Know When to Retire the Entire Shovel
Sometimes the patient is too far gone. If the socket wall has a crack longer than ½ inch, or the blade is rusted paper-thin (poke it with a screwdriver—if the tip goes through, it’s toast), donate the metal to a scrap yard and treat yourself to a new tool. A weakened blade can snap mid-pry and send you flying. Trust me, face-planting in front of the neighbor is only funny on YouTube.
Step-by-Step: How to Replace a Shovel Handle
Step 1 – Diagnose the Break
Set the shovel upright, grab the head, and twist. More than a finger-width of play means the wood inside the socket is crushed or the rivet has sheared. Look for grain separation longer than two inches. Anything shorter can live another day wrapped with fiberglass tape.
Step 2 – Strip the Old Handle

Pop the shovel in a vise or wedge it against the picnic table. Drill out the old rivet with a ¼-inch bit; if you hit a square cut nail, drive it through with a nail set. Twist the carcass out. If it laughs at you, drizzle WD-40 into the socket, wait five minutes, and rock while tapping the blade’s underside with a rubber mallet.
Step 3 – Size the New Handle
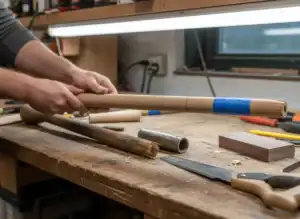
Hold the replacement handle alongside the corpse and mark the length with painter’s tape. Standard digging shovels are like 48 inches; trenching shovels prefer 30–36 inches. Cut with a fine-tooth saw, chamfer the edge, and sand until it feels baby-bottom smooth.
Why diameter matters: A handle that’s too thin will flex excessively under load, making digging inefficient and tiring. Too thick, and it won’t fit snugly in the socket. Measure the inside of the socket and select a handle with a matching diameter. Then fine-tune with sanding or rasping if needed. This ensures the shovel has optimal leverage and prevents premature splitting.
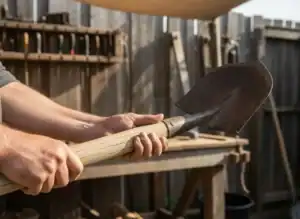
Step 4 – Dry-Fit & Dance
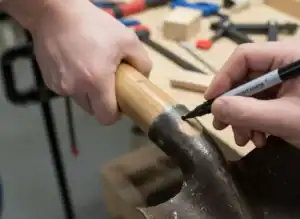
Slide the new handle home. The shoulder should nestle flush—no diving-board gaps. Spin and press until you hear the satisfying “thunk.” Mark the rivet hole location with a skinny Sharpie, then pull the handle back out.
Step 5 – Drill & Pin
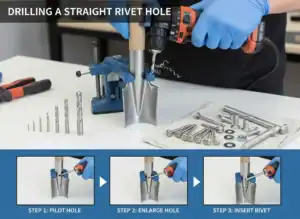
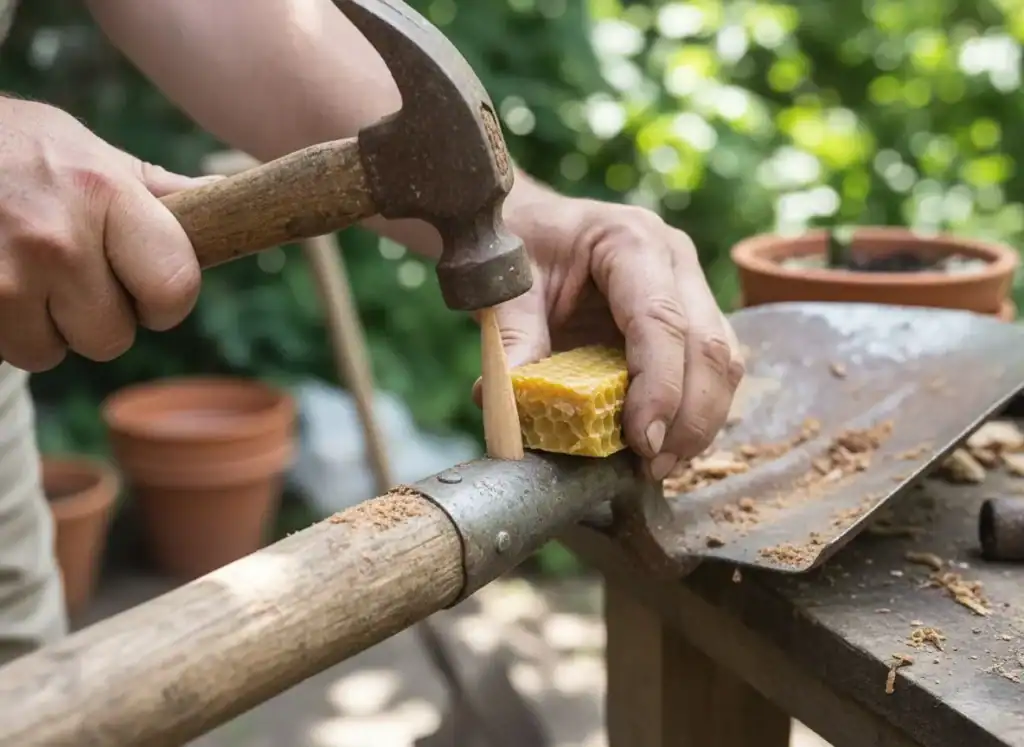
Clamp the socket upright. Drill straight through both walls, starting small (1⁄8 inch) and stepping up to ¼ inch so the bit doesn’t wander. Pop in a stainless rivet or galvanized bolt with a nylock nut. Tighten until the head dimples, but stop before the socket buckles.
Step 6 – Seal the Deal

Flood the end grain with boiled linseed oil, wait 15 minutes, wipe off, repeat the next day. Two coats swell the wood just enough to lock the socket. Fiberglass? Skip the oil; run a bead of clear silicone around the rim to keep grit out.
Step 7 – Test It
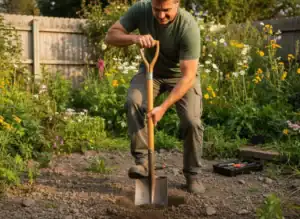
Find the meanest patch of earth and jump on the shoulders. Zero wiggle? Do the happy dance. Still clanky? Head back to Step 5 and add a second pin. Better to over-build than to catapult metal across the petunias. Learn how to shovel a driveway with less pain.
Safety First – The No-Bleed Checklist
Safety glasses: high-speed oak splinters are faster than your blink reflex.
Gloves: not for fashion—splinters hurt more than break-ups.
Vise or solid clamp: a wobbling blade is a finger guillotine.
Oily rag protocol: lay linseed-soaked rags flat to dry outside; spontaneous combustion is a party trick nobody wants.
Always remember, working with a shovel is always a good exercise unless you get hurt.
Local Considerations & Sourcing Handles
Humid climates (hello, Florida) turn ash into accordion fodder unless you seal every cut with spar varnish. If you live where termites have their own ZIP codes, spend the extra two bucks on fiberglass. Big-box stores stock “universal” handles that are really one-size-fits-nobody.
Bring the old handle to the store and play Cinderella. No local store? Online sellers list socket dimensions. Measure across the inside of the socket with a caliper or a drill bit shank. Order one size up; you can always rasp away wood, but you can’t rasp it back on.
Maintenance (Two Minutes per Season)
After the last scoop of compost, hose off the blade, dry it, and wipe the handle with a microfiber cloth dabbed in linseed oil. Hit the metal with cooking-spray vegetable oil. Hang the shovel vertically so moisture drains away from the neck. This tiny habit has pushed my hickory handles past the decade mark, which means more cash for seeds, silly gnomes, and the occasional oversized-pumpkin contest. If you maintain your shovel properly, it will save you money over the year.
Off-Season Storage – Keep Your Handle Happy
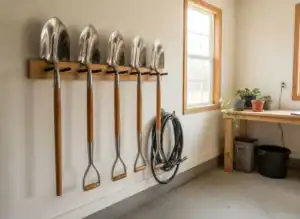
A shovel is like a dog: neglect it, and it’ll let you down. After the last frost or compost scoop, store your shovel vertically, off the ground, and away from moisture. Keep the handle lightly oiled and the blade dry to prevent rust and warping.
Bonus points if you hang it near a window. Sunlight keeps mold at bay and reminds you which tool is the garden MVP. A little seasonal TLC now means decades of wobbly-free digging later.
Environmental Bonus – Repair > Replace
Repairing instead of tossing keeps roughly 1.8 lbs of steel and 0.5 lbs of hardwood out of the landfill per shovel, according to EPA municipal waste data. Multiply that by the 11 million shovels sold in the U.S. each year, and suddenly your 20-minute fix is a tiny climate high-five.
People Also Ask – Quick-Fire FAQ
Can I reuse the old rivet?
Only if it’s pristine. Once bent, rivets lose grip. Fresh hardware costs 30 ¢ and saves heartbreak.
How do I know if the socket is too worn?
A: If you can wiggle the head more than ¼ inch on the new handle, the socket walls have stretched. Time for a new shovel—or weld a washer inside the neck if you’re fancy.
Is fiberglass stronger than wood?
Tensile strength runs about 60,000 psi for fiberglass vs 15,000 psi for ash, but wood absorbs shock better. Choose your superhero power.
Can I shorten a handle that’s too long?
Absolutely. Cut from the bottom, re-chamfer, and re-drill the grip hole if you use a D-handle.
Why not just buy a new shovel?
Because you’ll cry less when you snap a $6 handle next year instead of a $50 tool, and landfills will thank you.
Does the grain direction matter?
Yes. Mount the handle so the grain lines run front-to-back with the blade. This orientation resists splitting when you pry.
How tight should the pin be?
Snug enough that you can’t spin the head by hand, but not so tight that the socket deforms. Think firm handshake, not death grip.
What type of wood lasts longest for a shovel handle?
Hickory and ash are the top choices for durability. Hickory handles are tough and slightly heavier, resisting splitting even under heavy-duty digging. Ash is springy and absorbs shock well, but may require seasonal oiling to maintain flexibility.
Is it safe to use a snapped shovel temporarily?
Only for very light tasks and if the crack is minor. For anything heavy or awkward, replace the handle immediately—splintering or sudden failure can cause serious injury.
Can kids help?
A: Kids love drilling and hammering. Give them safety glasses and let them paint the handle with bright colors afterward—easy to spot in tall grass.
Conclusion
Learning how to replace a shovel handle feels like earning a merit badge in adulting. You save cash, rescue a trusty friend, and gain bragging rights at every backyard barbecue.
The first time you sink that revived blade into soil and feel zero wiggle, you’ll understand why I do a little jig each time. Grab a hickory handle this weekend, pour yourself something cold, and turn that tragic snap into the best garden story you’ll tell all year.


